WooCommerce
Integrating ChargX Payment Gateway with WooCommerce
This guide explains how to install, configure, and test the ChargX payment gateway inside your WooCommerce store.
Prerequisites:
- A WordPress website running WooCommerce 6.0+
- PHP 7.4+
- A live or sandbox ChargX account
- SSL certificate (required for live mode)
Step 1 — Install the ChargX WooCommerce Plugin
Method A — Install From Plugin ZIP
- Download latest plugin zip https://github.com/chargx/chargx-woocommerce-plugin/archive/refs/heads/main.zip (in a case you want to check release notes - check releases page https://github.com/chargx/chargx-woocommerce-plugin/releases)
- Login to your WordPress Admin Dashboard.
- Navigate to:
Plugins → Add Plugin → Upload Plugin - Upload the file:
chargx-woocommerce-plugin-main.zip - Click Install Now.
- After installation, click Activate.
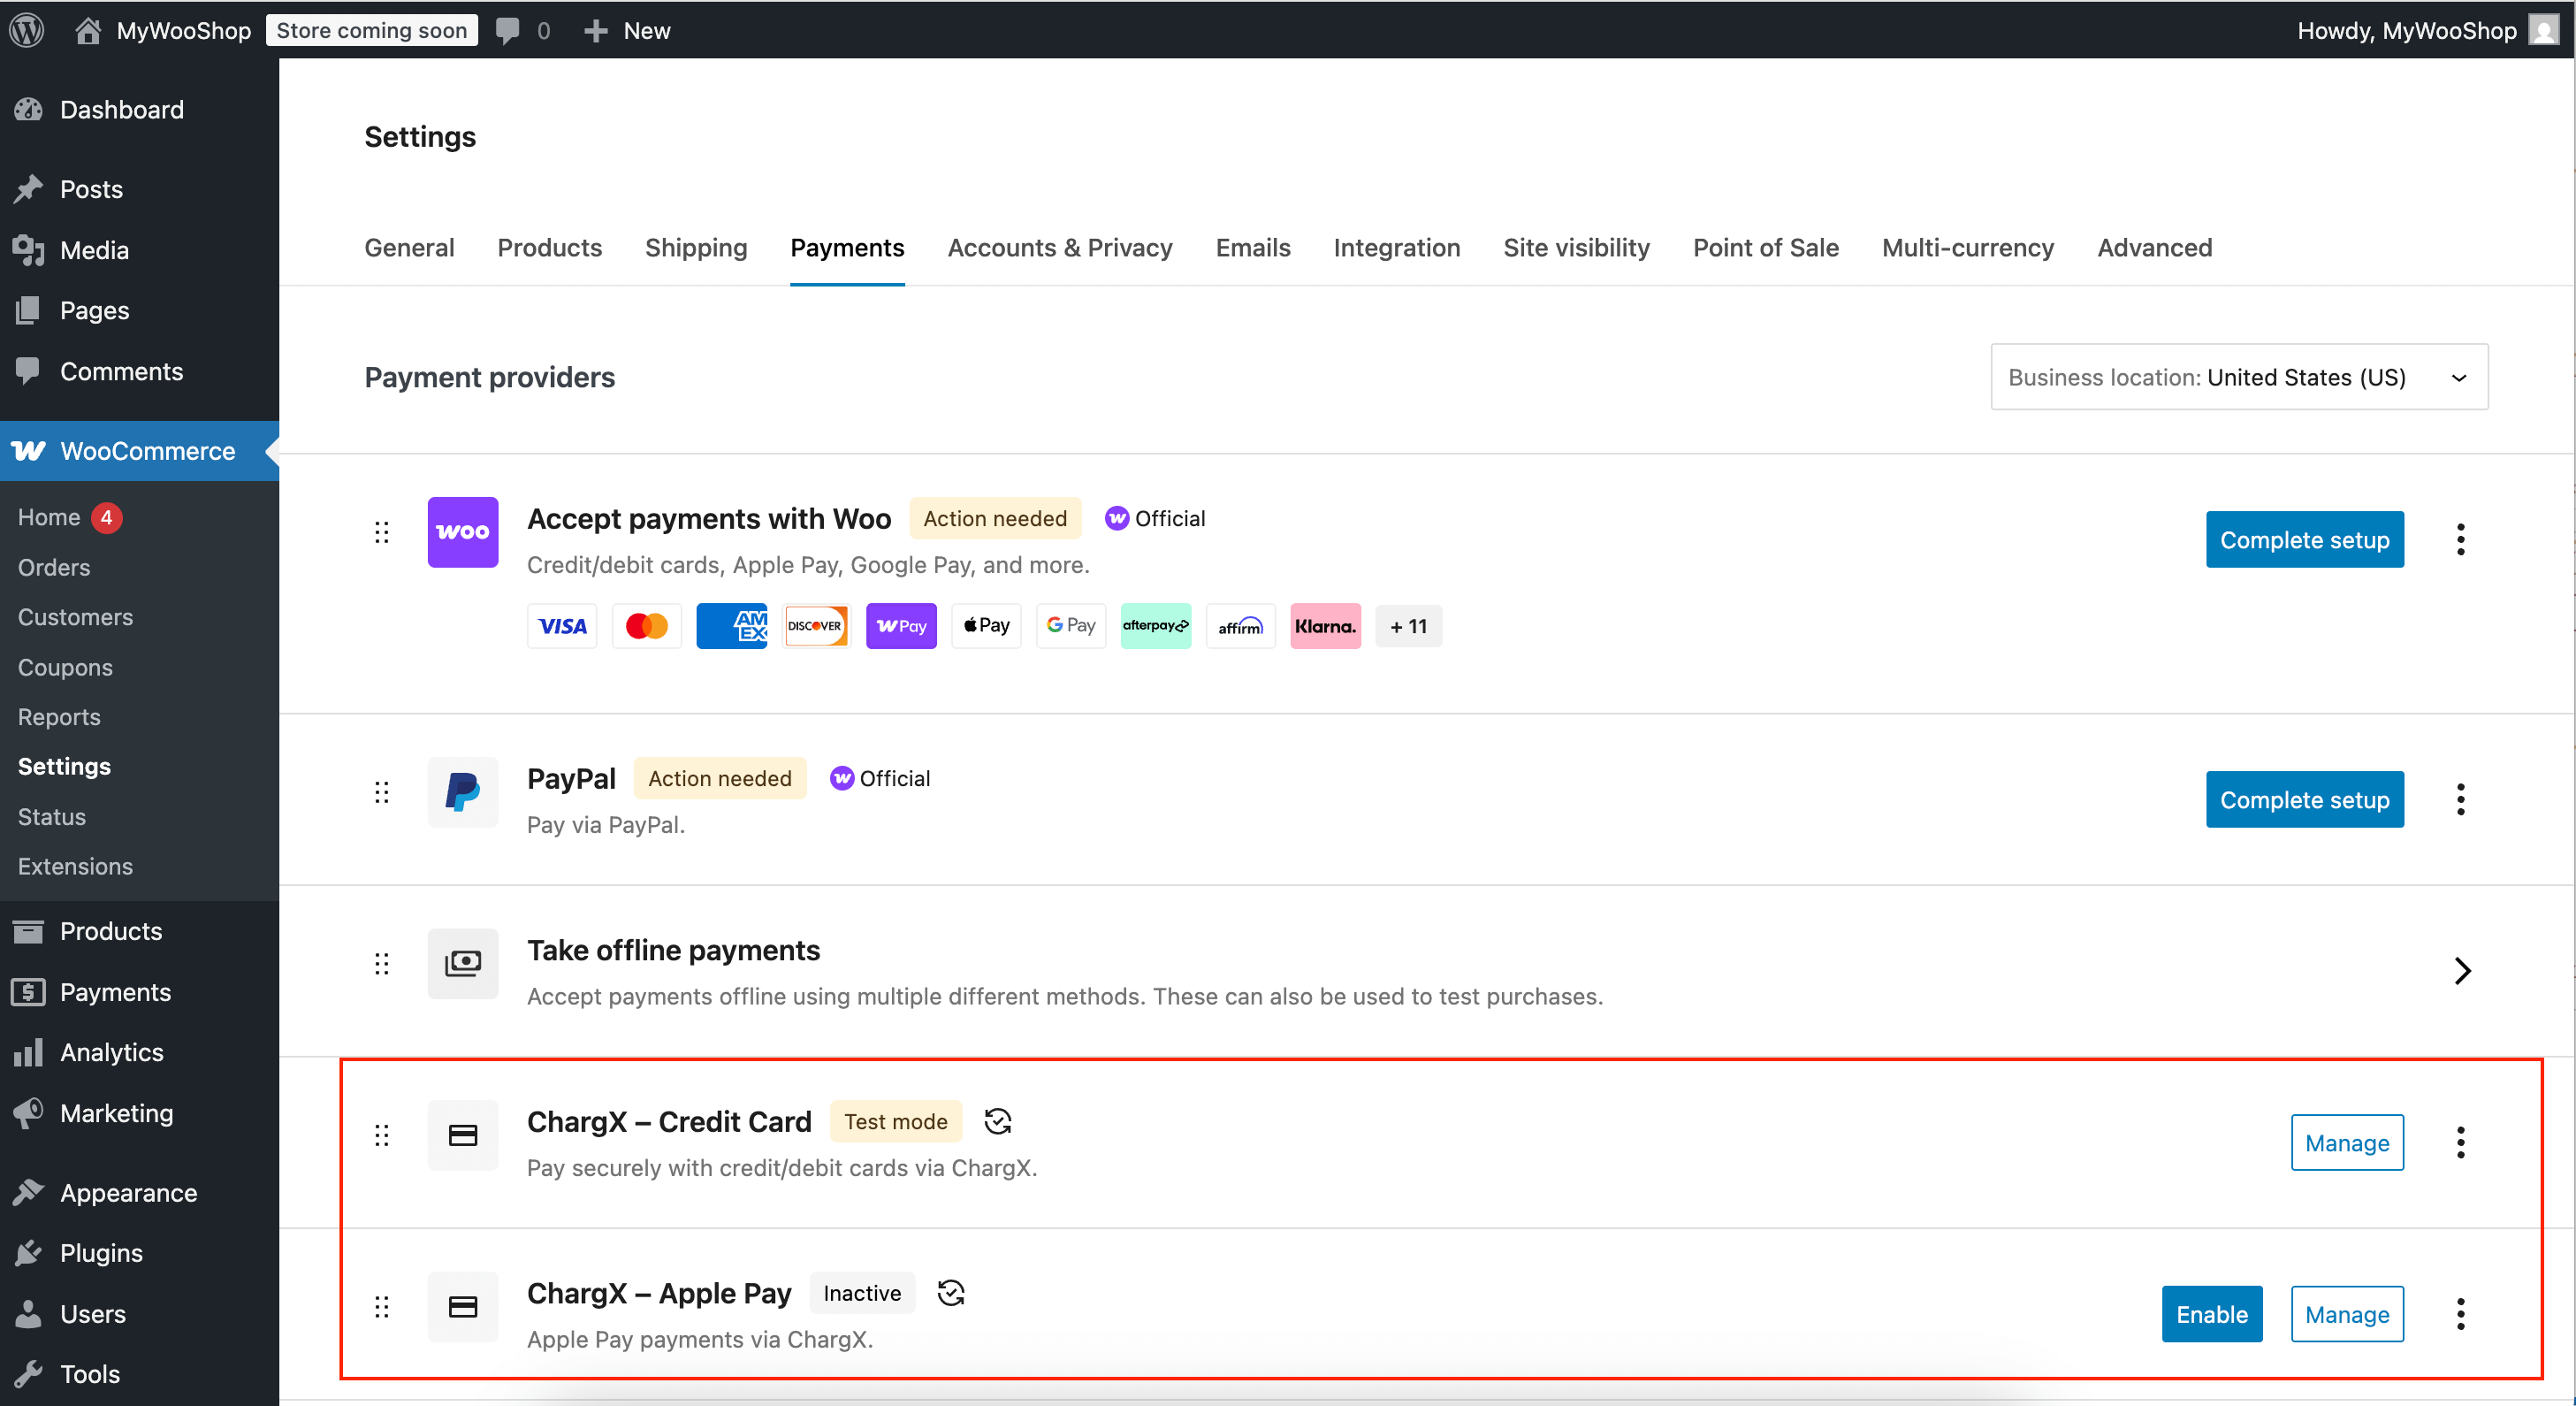
Step 2 — Enable ChargX in WooCommerce
- Go to:
WooCommerce → Settings → Payments - Locate ChargX - ... in the payments list.
- Toggle the switch to Enabled for required payment methods (e.g. Pay-By-Bank, Credit Card, Apple Pay, Google Pay)
- Click Manage to open configuration settings.
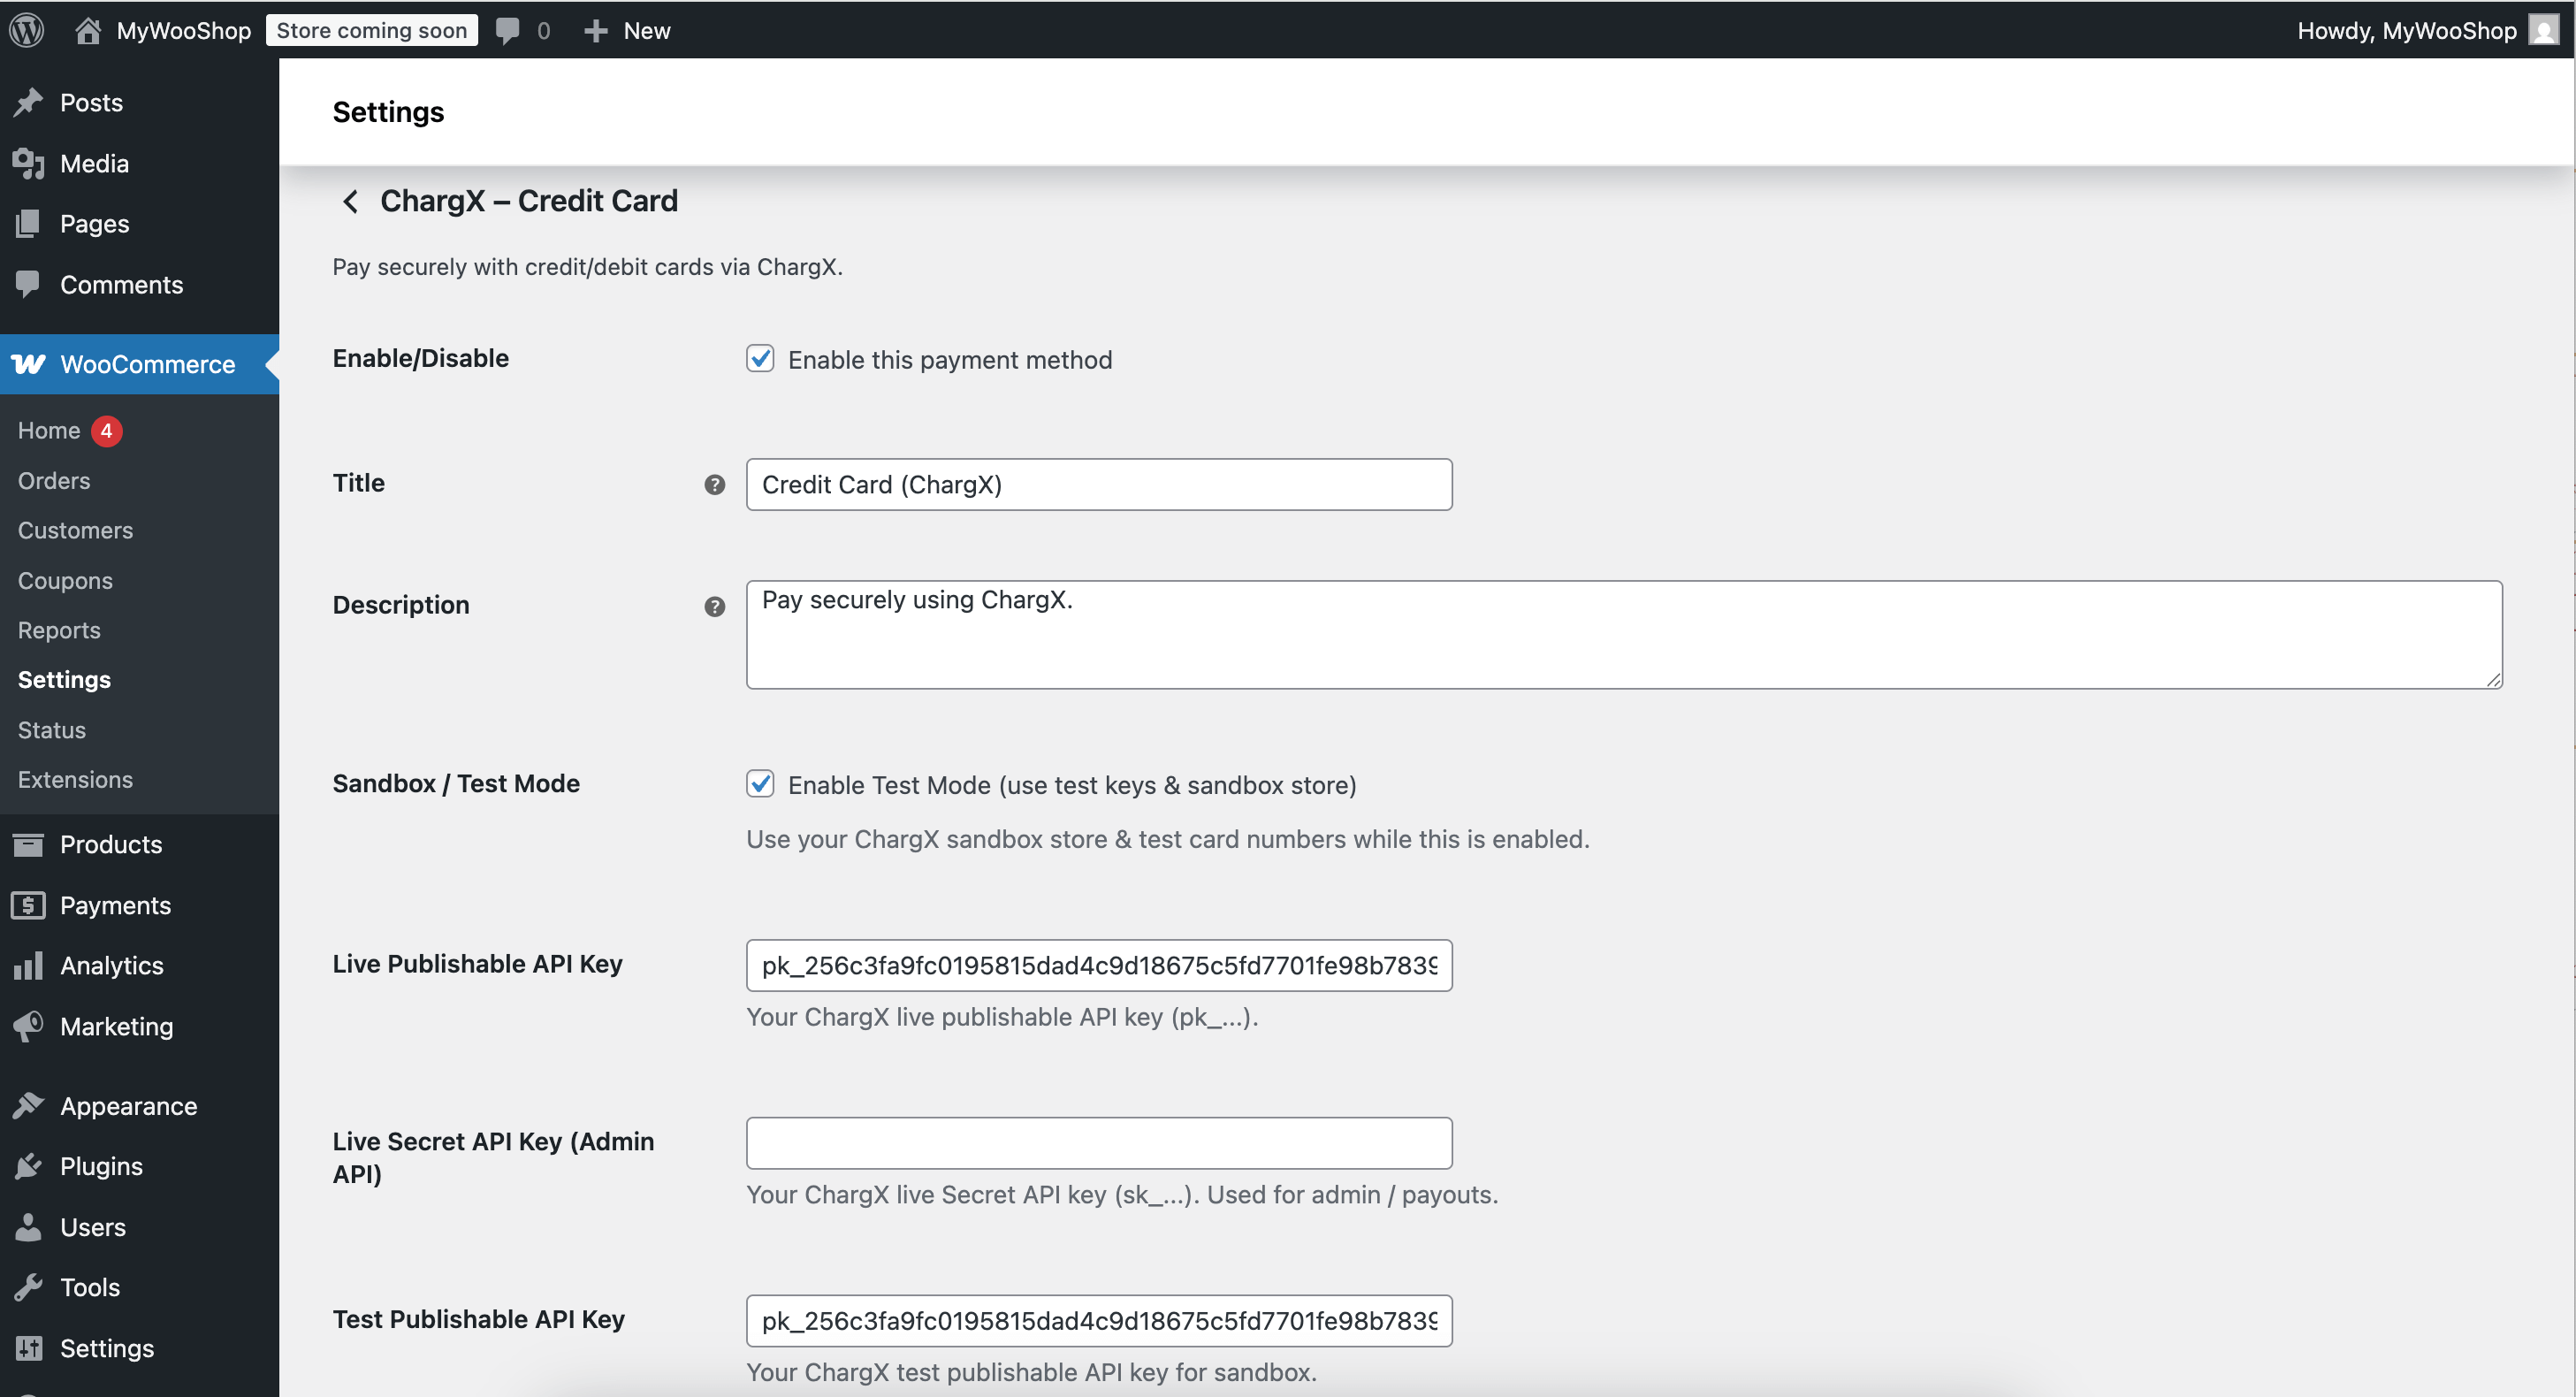
Step 3 — Configure Your ChargX Credentials
You'll need credentials from your ChargX Dashboard.
| Setting | Description |
|---|---|
| Live Publishable API Key | Used for generating secure tokens in Production mode |
| Test Publishable API Key | Used for generating secure tokens in Test mode |
| Live Secret API Key (Admin API) | Used for server-side API calls in Production mode |
| Test Secret API Key (Admin API) | Used for server-side API calls in Test mode |
| Sandbox / Test Mode | Sandbox or Production mode |
Payment Options
ChargX supports multiple payment workflows:
| Option | Description |
|---|---|
| Pay-By-Bank | Direct bank transfer between bank accounts |
| Credit & Debit Cards | e.g. Visa, MasterCard |
| Apple Pay | Requires Apple domain verification |
| Google Pay | Supported on compatible browsers |
Enable or disable each option under the Payment Methods section in the plugin settings.
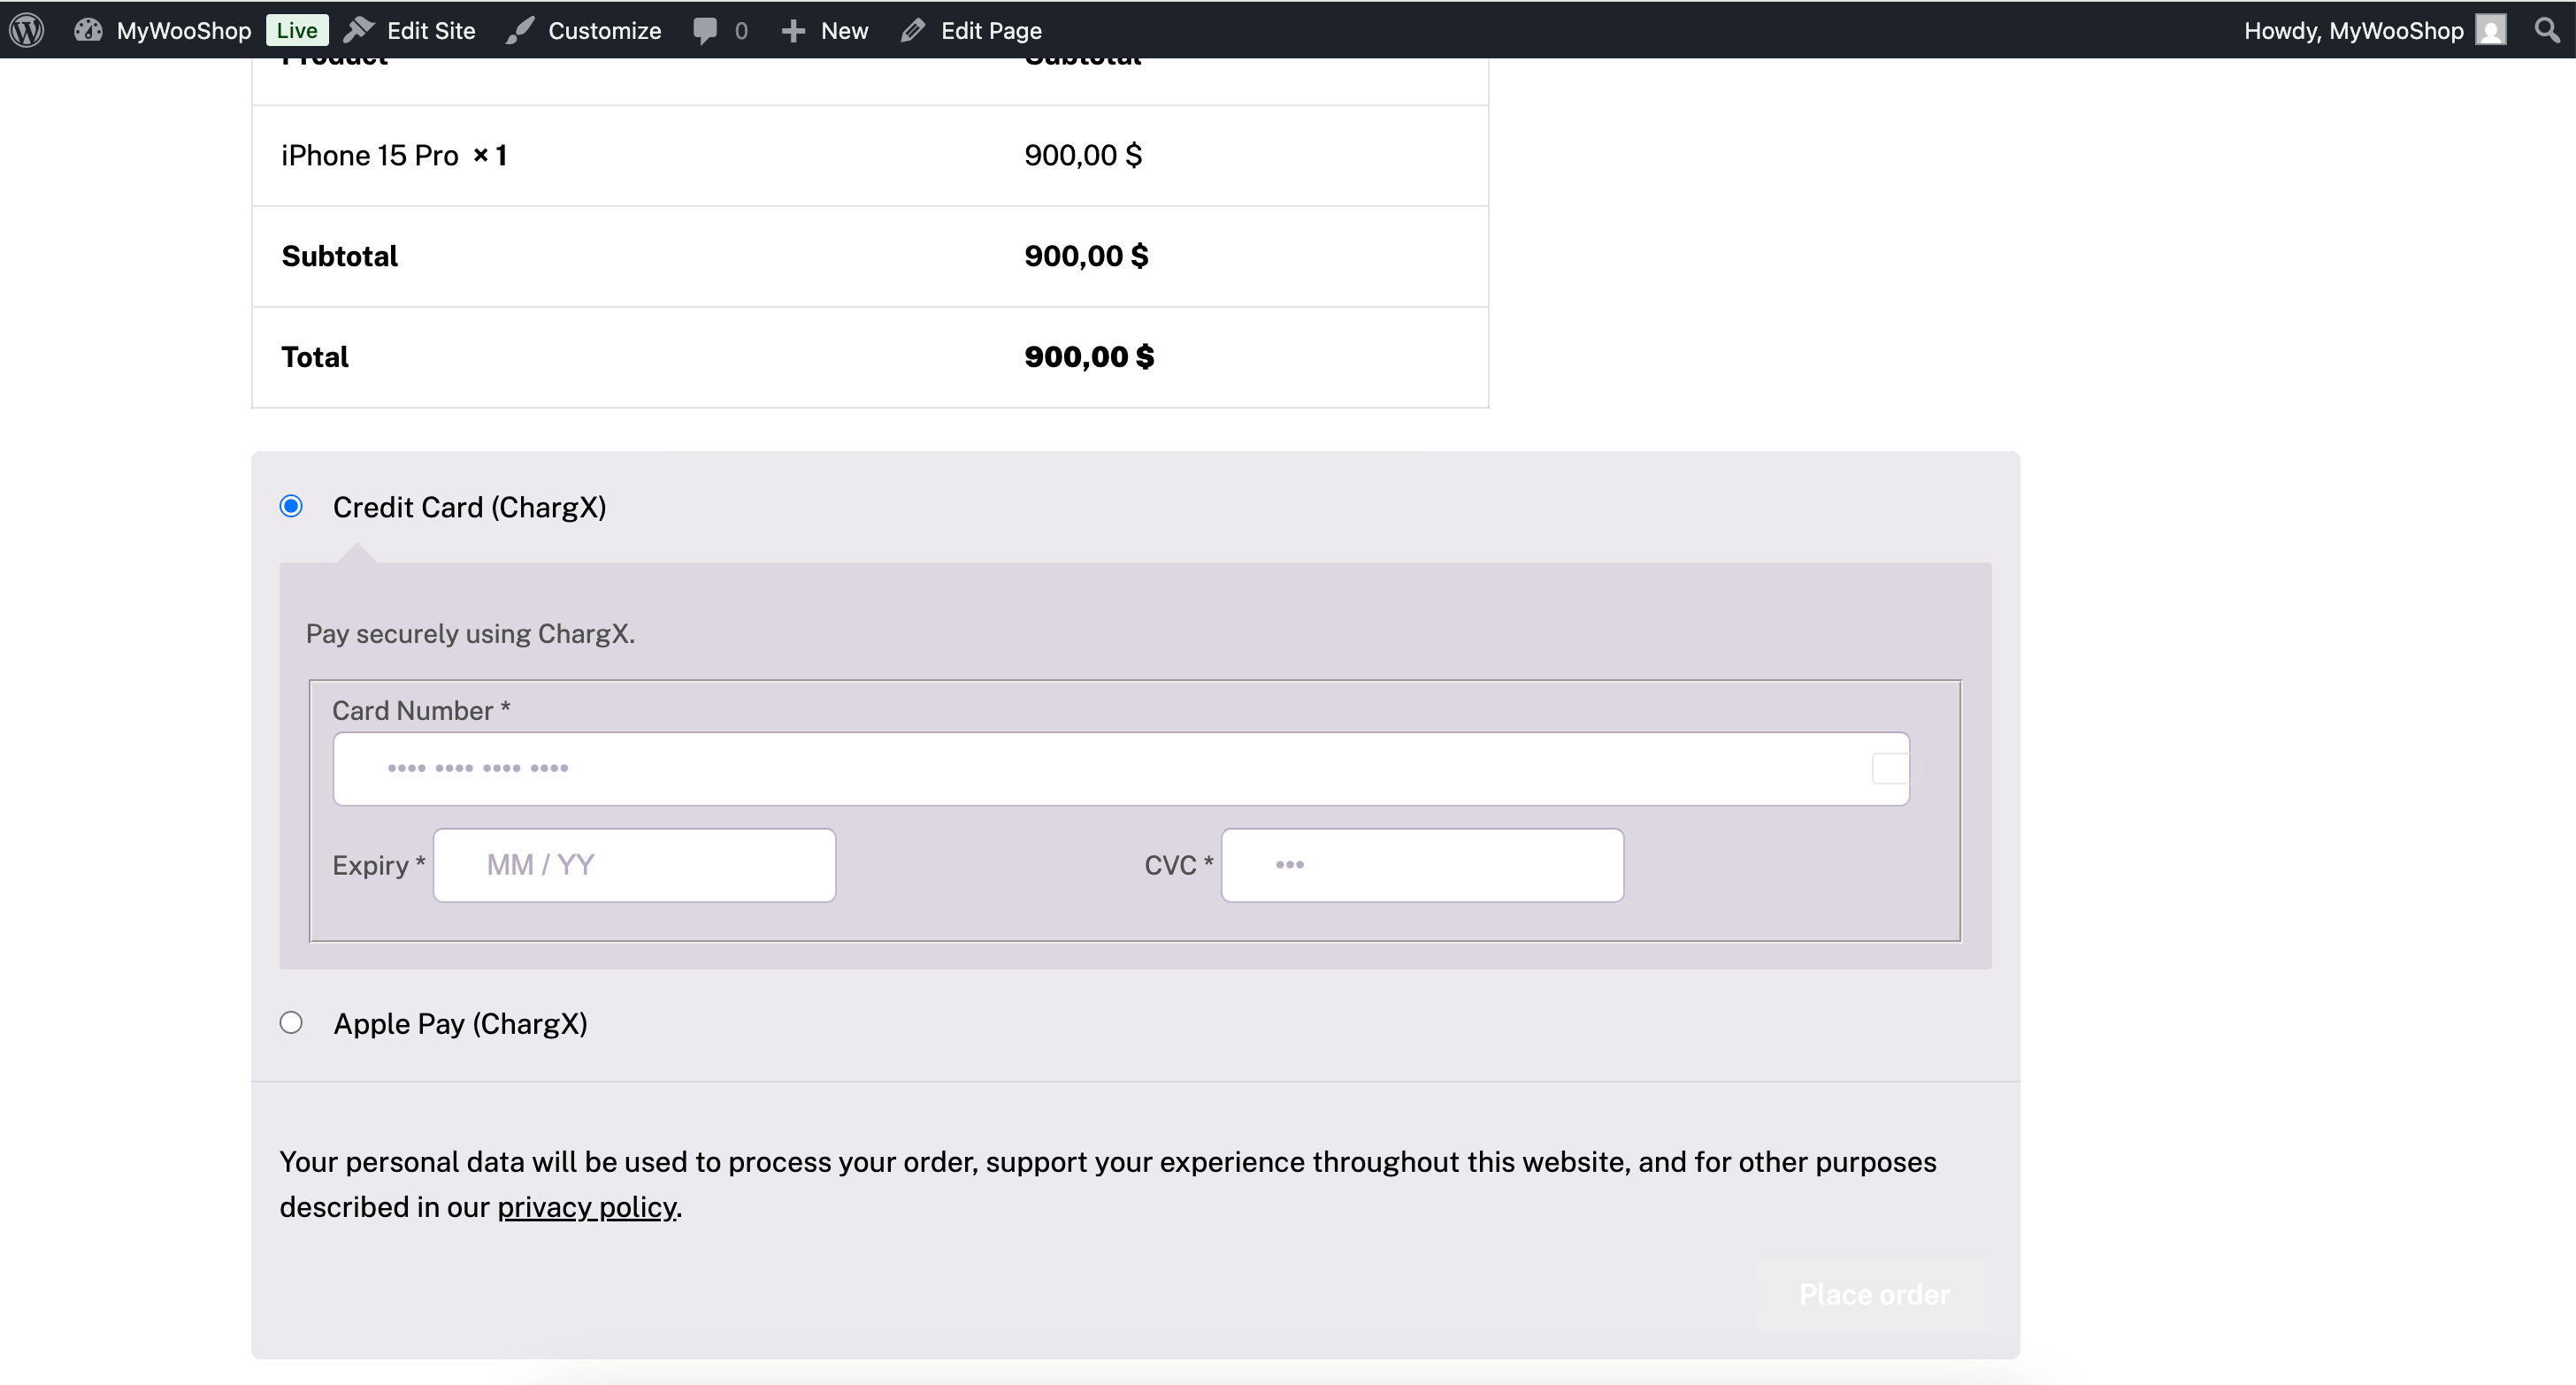
Step 4 — Test a Transaction
- Ensure Environment = SANDBOX in your store.
- Add a product to your cart and proceed to checkout.
- Select ChargX as the payment method.
- Use a test card from the ChargX developer docs - see Testing Guide
- Confirm the order and verify status updates in:
- WooCommerce Orders Screen
- ChargX Dashboard → Orders
Troubleshooting
There are no payment methods available. Please contact us for help placing your order
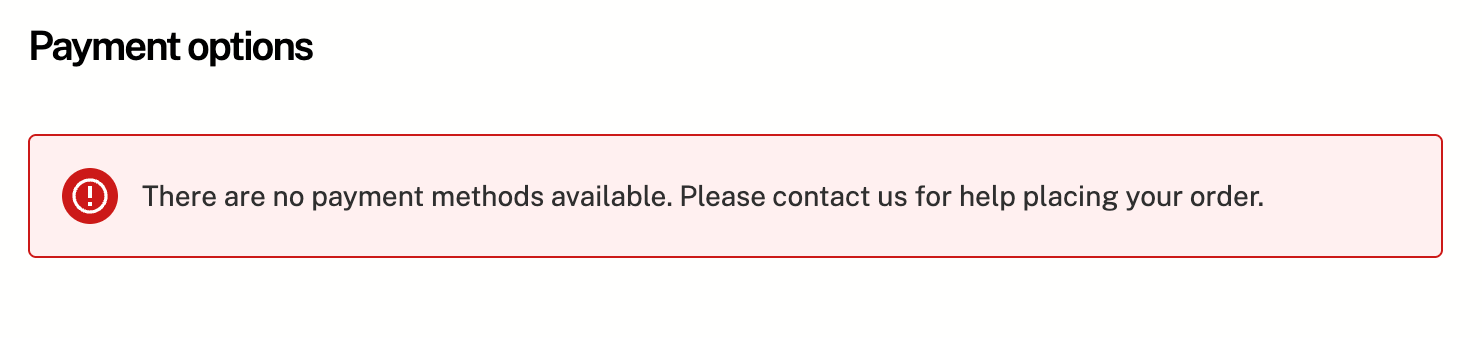
If you get a warning There are no payment methods available. Please contact us for help placing your order. on Checkout page, but the plugin is enabled and configured properly, you're very likely on the new WooCommerce Block-based Checkout, not the classic shortcode checkout which is used by the plugin.
The easiet solution is the following:
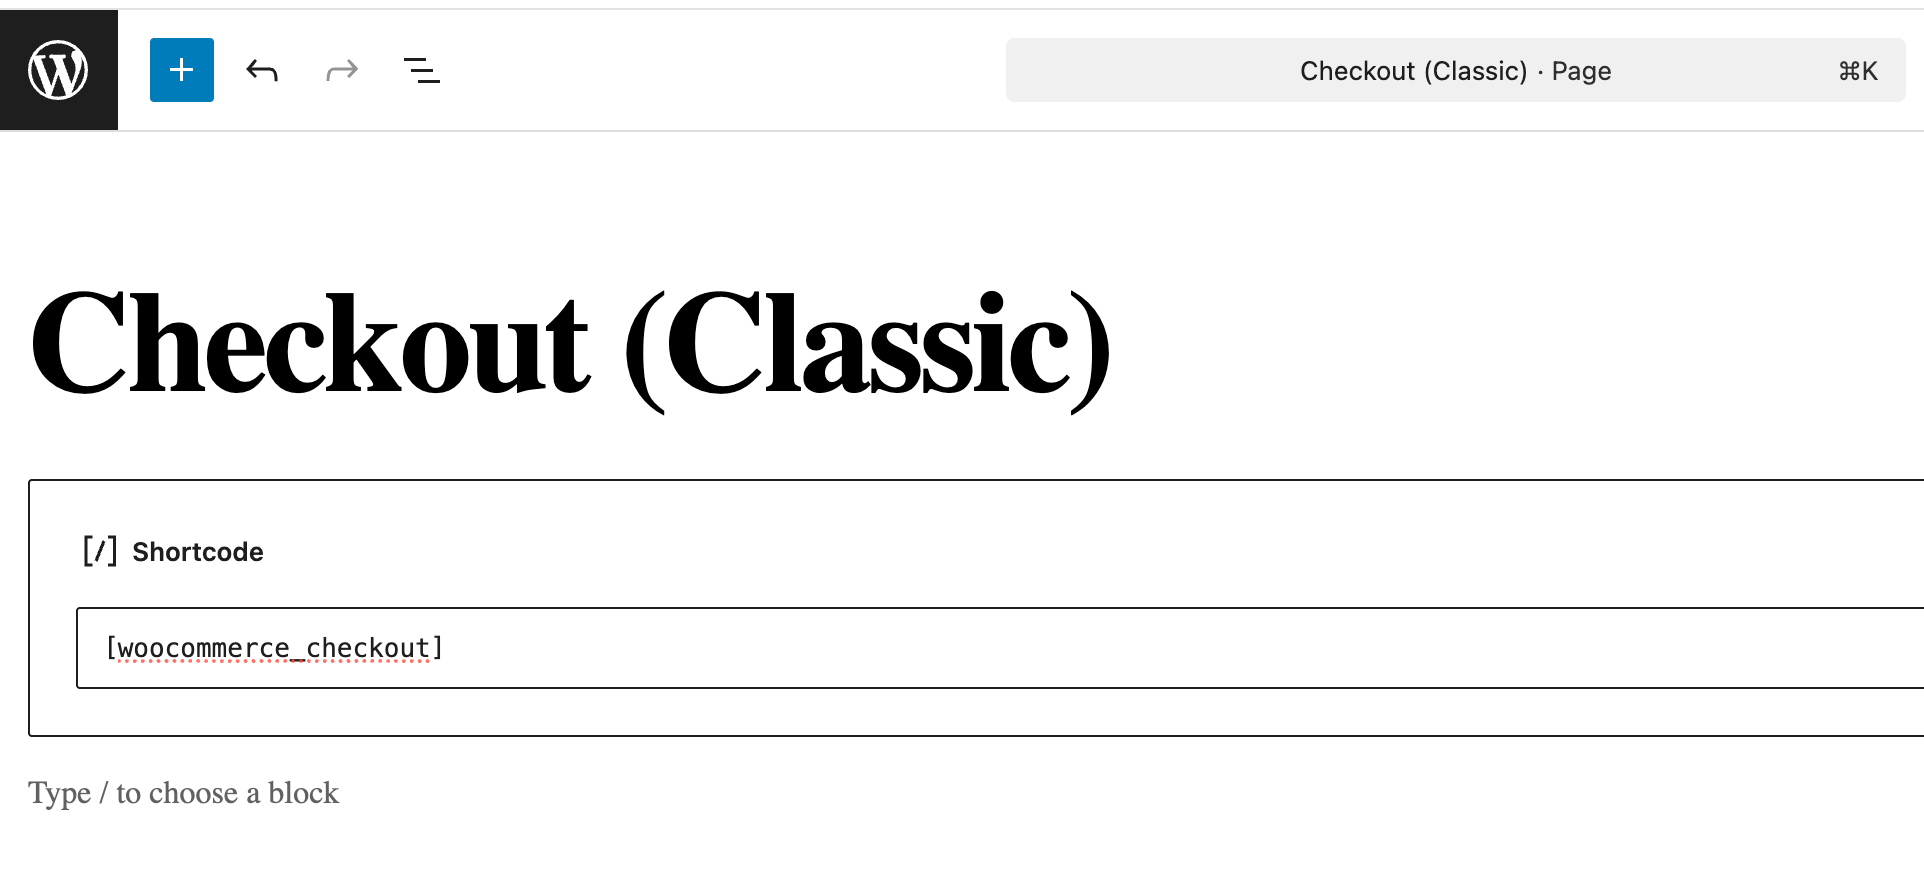
- Create a new page in WP admin:
- Pages → Add New
- Title: Checkout (Classic)
- Content:
[woocommerce_checkout] - Publish.
- In WooCommerce → Settings → Advanced → Checkout page, point the Checkout page to this new classic page.
- Add product to cart, then go to checkout - you should see the payment form now.
Later we will add support of WooCommerce Blocks Payment API in the plugin.