Webhooks Setup
Configure webhooks in the Admin panel to receive payment events
This guide explains how to set up Webhooks in the Admin panel so your backend receives events (for example when a payment succeeds). Webhooks are tied to your Store.
Access Webhooks
- Log in to the Admin dashboard.
- Go to Settings → Webhooks.
You’ll see the list of webhook endpoints for the current store.
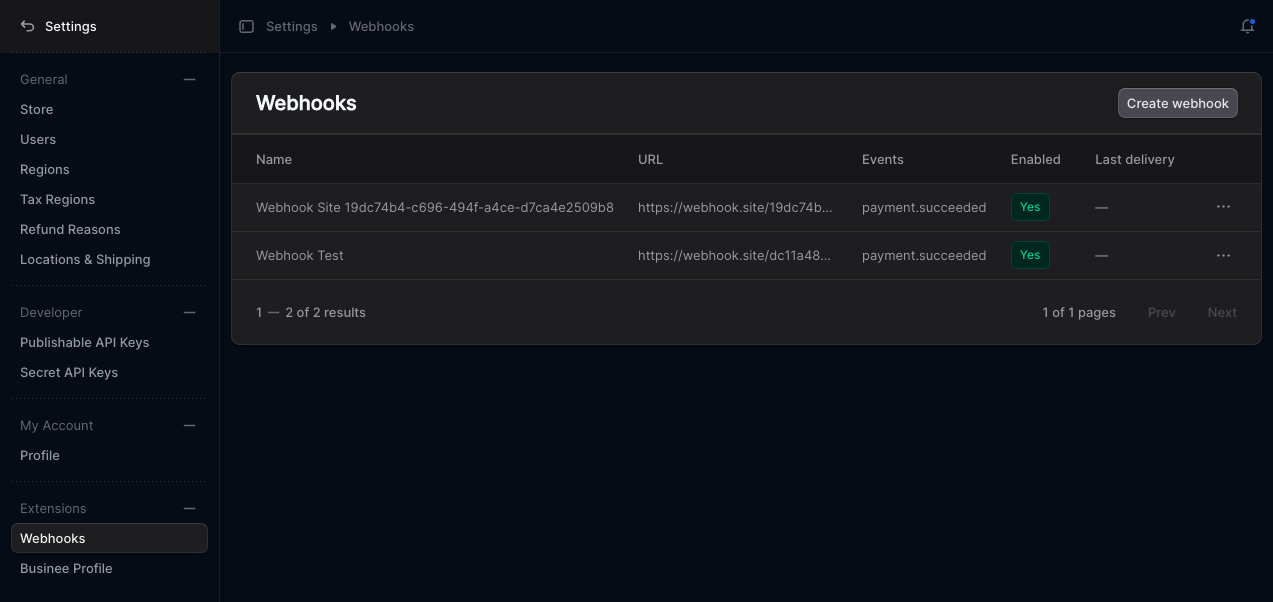
Create a webhook endpoint
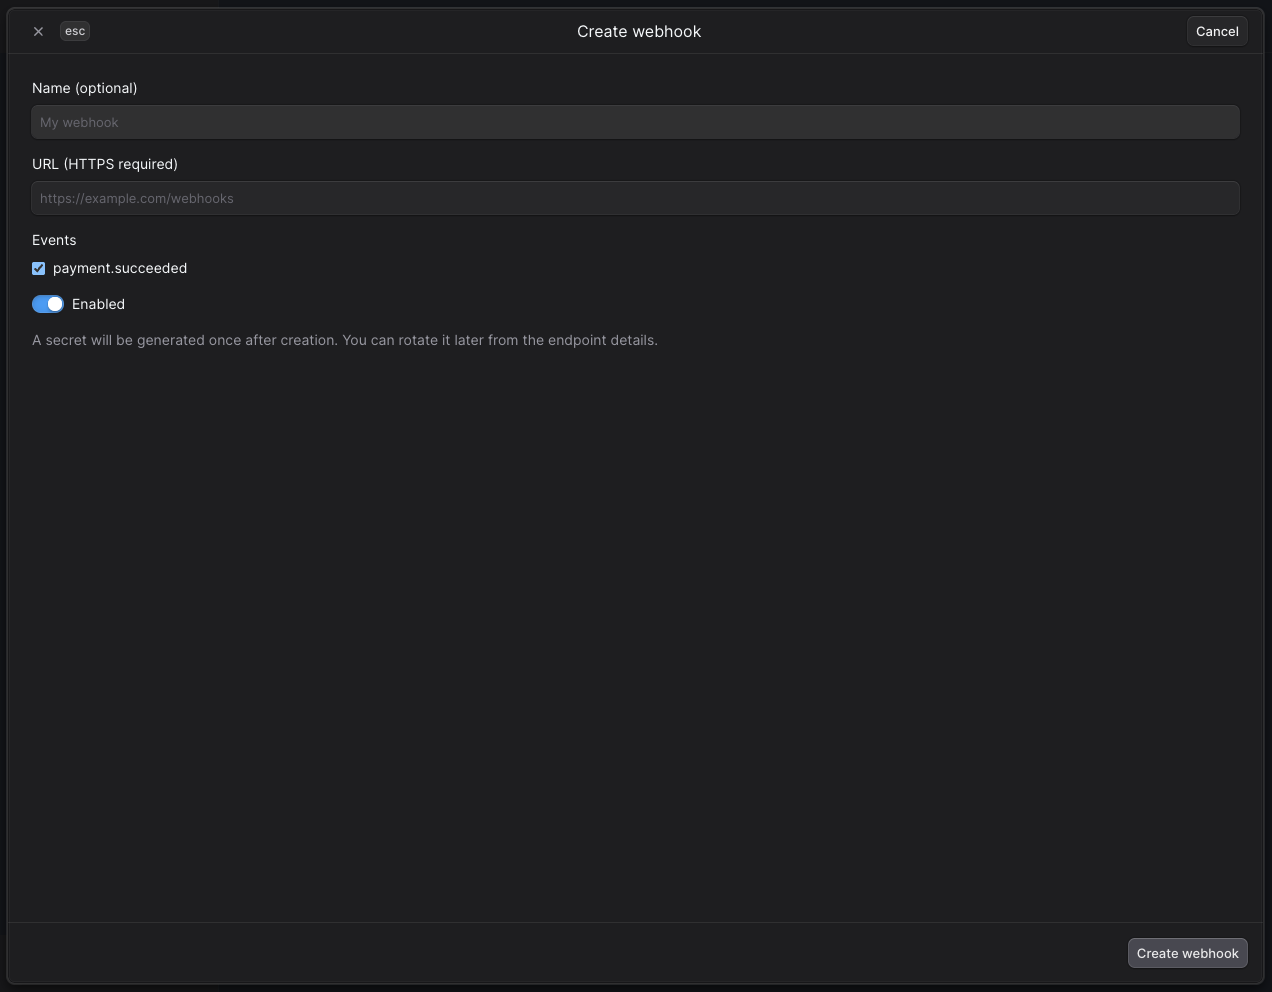
- On the Settings → Webhooks page, click Create webhook.
- Fill in:
- Name (optional) — e.g. “Production payment notifications”.
- URL (HTTPS) — the endpoint that will receive POST requests (must use HTTPS).
- Events — select payment.succeeded (and any other events you need).
- Enabled — leave on so deliveries start immediately.
- Click Create webhook.
- Copy the secret shown once (e.g. from the modal or clipboard). You’ll use it to verify request signatures.
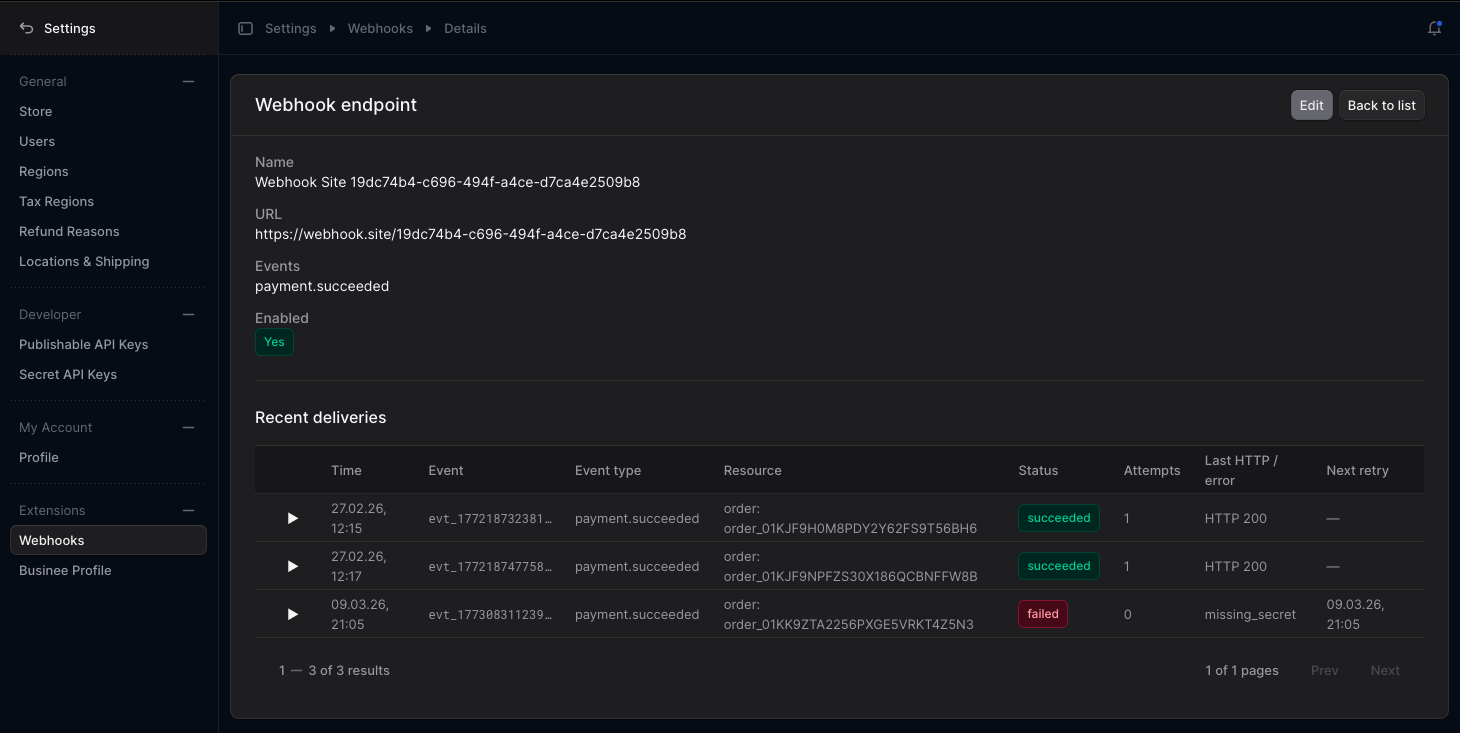
View and edit an endpoint
- View details: Click a row (or the endpoint name) to open the Webhook endpoint detail page. There you can see the endpoint configuration and Recent deliveries (time, event, resource, status, attempts).
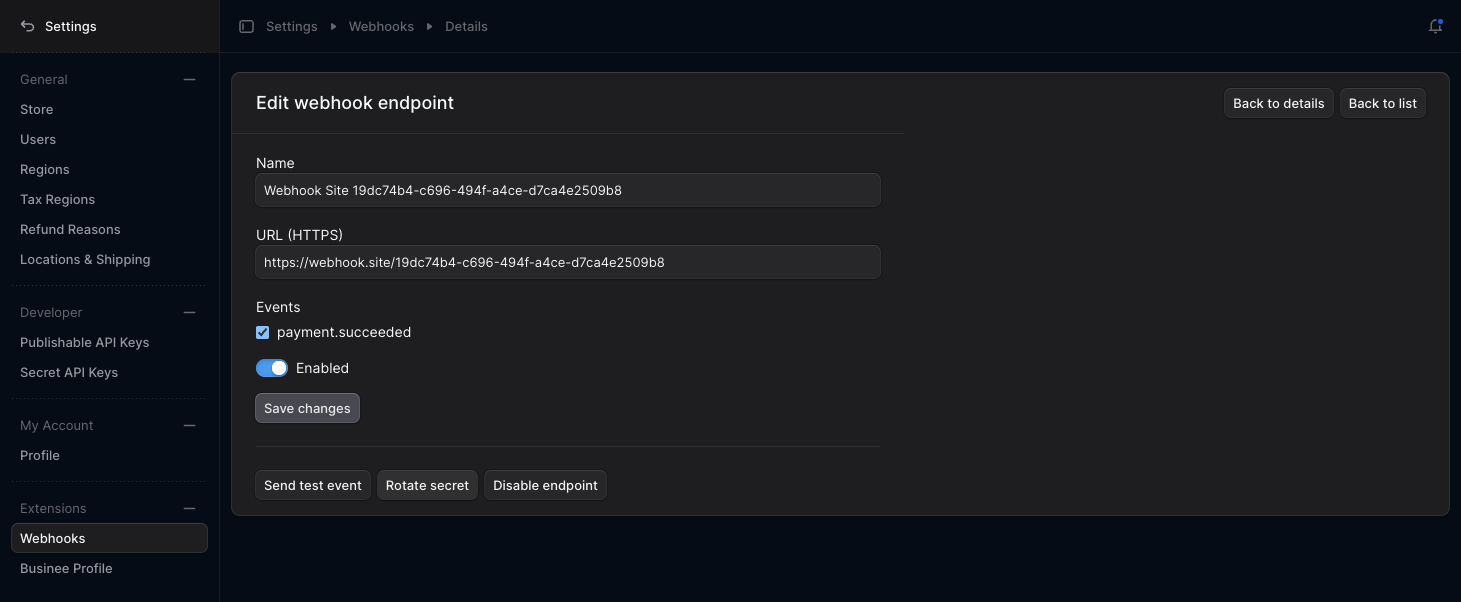
- Edit: Click Edit (or use the row action) to change Name, URL, Events, and Enabled. Save your changes.
Secret and test
- Rotate secret: On the detail or edit page, use Rotate secret. A new secret is generated; store it securely and update your verification logic.
- Send test event: Use Send test event to send a sample payload to your URL. Check the response (e.g. green/red badge) to confirm the endpoint is reachable.
Verifying webhook requests
Requests are signed. Use the Webhook secret to verify each request:
- Webhook-Id — event id.
- Webhook-Timestamp — Unix timestamp (seconds).
- Webhook-Signature —
HMAC-SHA256of{timestamp}.{raw_body}(hex), prefixed withv1=.
Compute HMAC-SHA256(secret, timestamp + "." + rawBody) and compare with the v1=... value in the header to ensure the request is from ChargX and unchanged.